Wednesday, April 13, 2011

My First Sweater!!!

I finished my very first sweater a few days ago and wore it to work yesterday. It isn't the best sweater (I re-sized it too big!) but I am super proud of it!

It is from a vintage pattern and I did it as part of the Briar Rose Knit-a-long over at By Gum, By Golly. I decided that it looked better on me with an open neckline so I didn't bother to attach the buttons to the front. Now on to another knitting project!

That's All.

Sunday, April 10, 2011

Old Photos, Books, and an Award!

The last few weeks have been decidedly boring. I get up, go to work, come home, go to sleep and that is basically my day. But I have managed to get out a bit on weekends and do some antiquing.

I checked out what was advertised as Eastern Ontario's largest antique mall. I found it rather disappointing. The overall quality was poor, however I did find a few old photos to "adopt". I always feel so sad when I see photos of unknown people whose families have forgotten them or died out. I had to buy a few, but I have had to place them on my bookcase so they don't stare at me while I'm sleeping (I love the photos but the idea of dead people staring at me while I sleep seriously creeps me out!)


I also went to the Kirby Church book sale. It is a small, old church just outside of Orono. They are trying to raise money to move it to the museum site and have started selling used books again on Saturdays. Paperbacks are only 50 cents and hardcovers are a dollar. I may have bought a few books.....


I have also a bought two other books at antique stores over the last week. One is a 1920's dancing guide and the other is a 1947 needle-working book. I highly recommend trying to get a copy of the needle working book. It is great for both beginners and for more advanced needlecrafters, and has a great range of project ideas!


In other news, I have been kindly given an award from The Paper Doll Says "Let's Have Tea!". Thank you so much! I think I am supposed to pass it on to some great blogs with less than 300 followers, so I am passing this onto:

Lauren Hairston
It'll Take The Snap Out Of Your Garters!
Baby Steps into Vintage
Butterflies and Daisys Vintage
Honey Hi Vintage
That Vintage Broad
I've got an Island
Good Rockin' Baby
Porcelina's World
Susan's Diary- Vintage style meets heavy music
The Modern Day Flapper
Tickety Boo Tupney
So feel free to pass this award on if you want to!

That's All.

Sunday, April 3, 2011

DIY 1920's Inspired Dress

Spring weather is almost here and summer is just around the corner. It is time to start wardrobe planning for the warmer months ahead. Here is a (hopefully!) simple tutorial for a 1920's inspired dress.


I love the 1920's but clothing from the 1920's comes with a hefty price tag and if often too delicate to wear. This dress is very basic but gives a 1920's look using a minimum of fabric. It looks best when done in a light sheer or silky material. (The pink version of this dress was created with a sheer fabric that already had a ruffle along the bottom)

1920's Inspired Dress


You will need:

-a couple meters of fabric (2 meters should do it but you may need more or less depending on your measurements)

-thread

-pattern pieces for armhole facings (you could make your own but using some from an existing pattern is easiest. I used some from a 1960’s dress pattern)

-about 1 meter of trim for the bottom of the dress (if desired)


Note: All seam allowances are 5/8” unless otherwise stated. Most of my seams were also finished with pinking sheers.

1) Cut out two armhole facings and two large rectangles. The rectangles should be half the width of the widest part of your body plus 2 inches (I made mine 22” wide since my hips are about a 40”) and the length should be 2 or 3 inches longer then the desired length of your dress.


2) Decide what type of neckline you would like (I did a square neckline for my dress). Cut out a facing for the neckline (as shown in the diagram below) and sew right sides together to the top-center of one of the rectangles. 3) Cut out the excess material on the top of the rectangle. Turn the facing inside the dress then stitch in place to finish the neck of the dress. You should stitch very close to the edge of the neckline.

4) With right sides together, stitch the top of the two rectangles together. Press the seam open and stitch along the back part of the neck opening. Stitch very close to the edge like you did for the front of the neckline.

5) With right sides together, sew the sides of the rectangles together leaving a 2 inch gap at the top.

6) Sew your armhole facings according to the original patterns instructions (this will likely be only one seam joining the short edges to make a circle). With dress right side out, pin the armhole facings to the dress. It may take a bit of time to correctly position them on the rectangle.
7) Cut out some of the extra fabric on the inside of the armhole and sew the facings to the dress. The stitch line is shown in red in the below picture. Turn facings to the inside of the dress and stitch in place (as was done for the neckline).
8) Hem the bottom of the dress as required. Attach the trim if you are using any. This dress would look great with some beaded trim around the bottom (I looked everywhere for some but I couldn't find any in my price range!).

9) Cut strip of fabric about 3 ½ “ wide and 5 inches longer than your hip measurement. Use a zigzag stitch to finish the edges. This will be your waist tie. When wearing your dress, simply tie this around your hips to give the effect of a 20's style dropped waist.

And voila! You know have your very own 1920's style dress. Here are some more pictures of my two dresses:


Let me know if you have any questions or suggestions for tutorials you would like to see!

That's All.

Sunday, March 27, 2011

Is it Spring Yet?

I am getting mighty sick of winter! It is almost April but the weather forecast predicts snow next week! Oh well, I am just going to stay inside and start working on some new dresses for spring. After a very stressful week of calculating finances for my next school term and signing a lease for next term, I am in need of some relaxing evenings spent by my sewing machine. I figure making new spring clothes should also save a fair amount of money and use up some fabric in my stash.

So for some spring clothing inspiration, here are some pictures from a 1938 Spring Edition of Butterick: (By the way, the DIY tutorial will hopefully be coming next week. I just haven't had time to take pictures yet. Sorry!)

That's All.

Thursday, March 17, 2011

St. Patrick's Day

I'm not Irish, I don't drink, and I'm not going out to any parties today. Nevertheless I decided to be festive and wore a green dress to work. Happy St. Patrick's Day everyone!

1950's/60's Dress: Adelines Attic
Shoes: Winners
Jacket: Costa Blanca

I also got these super cute sunglasses at the mall yesterday. I have been looking for a pair of cateye sunglasses for over a year and I finally found some. Yay! I ended up buying them from Icings.
That's All.

Sunday, March 13, 2011

Postponed DIY and a rather boring weekend.

I wanted to thank everyone for their positive comments about my DIY seamed stockings post! I especially wanted to thank those who posted about my post. I was very flattered but due to my computer not letting me comment I was unable to express my appreciation. I have decided to try doing more DIY tutorials on here. If there is a certain type of project you would like to see leave me a comment! I will try to accommodate any requests :)

I had actually planned to do a DIY post today but the fabric store didn't have the trim I needed to complete the project. So here are two pictures as sort of a sneak peak. Can you guess what it is? (I'll give you a hint, the two pictures are actually two versions of the same project.)

This weekend has been quite boring since my mother decided to get sick and has now made me sick as well. At least it has given me plenty of time to work on my knitting for the Briar Rose knit-along. So far I have the back done and the collar.

I also went completely mad and turned my books the wrong way. I decided the books on my bookshelf looked ratty (all my pretty books are on display elsewhere in my room) so I turned them so you see the pages rather than the spines. I like how it looks but it might make locating books difficult (well slightly more difficult since they were already double stacked. 400 books do not fit very well on one tiny bookcase!).

That's All.

Monday, March 7, 2011

Casual Weekend Outfit

A lot of Saturday was spent in the car. I went to the Hamilton Home Show to see Sarah Richardson. She's my absolute favourite interior designer. (If you haven't seen any of her rooms, check her out. She is fabulous!) Unfortunately Hamilton is quite a distant away, so it took nearly 2 hours to get there.


Between a long car ride and dinner with my dad's side of the family (who tend to make snide comments about my vintage look) I decided to dress more casual than normal. I don't often wear jeans anymore but I decided to pair them with a grey vest and my latest sewing creation, a 1940's button up blouse. The picture was taken at the end of the day so unfortunately my hair and makeup wasn't as nice as earlier :(

Vest: Smartset
Jeans: Winners
Blouse: Sewn by me from a 1940's blouse pattern

The only other thing of note this week was that I received my giveaway prize from Porcelina's World. It was a lovely stationary set. I must say how much I loved the card she sent along with the gift. It was all so pretty!

One Last Thing...
As you may have noticed, I have added some pages along the top of my blog. I have created a page with links to neat vintage related websites I have come across (which I will hopefully be adding to), as well as a page with links to my accounts on various sites such as Ravelry (add me as a friend!).

The only page I am having issues with is the About Me page. I am totally stumped on what to write about myself. So I thought I would ask all of you what you would like to know. Leave me a comment asking me anything you would like to know (within reason...) and I will post my answers in the About Me section. It can be a serious or a silly question. Bonus points for creative questions!


Apologies again, but I am still having trouble with leaving comments. I'm not ignoring you all, I just can't comment on anything. It's driving me nuts!
Update: Ok after posting this, my computer decided I was allowed to comment again! Yay!!!

Tuesday, March 1, 2011

Typewriters and Technical Difficulties

First off, I must apologize for not responding to comments and not commenting on other people's blogs for about the last week and a half. My computer has decided it hates me and will not allow me to log in to post comments. I have tried everything I can think of but it still isn't working. While I continue to try and fix this problem please understand that I do read all your comments and every single post from every blog I follow, my computer just wont let me comment!

On a happier note I have finally replaced my old typewriter! As you may remember my typewriter was a very ugly 1990's model that wasn't working properly anymore. It would randomly decide to start typing in the centre or write in all captials, and then beep at me if I tried to change it back to normal! This is what it looked like:

Ok I may have edited the photo just a teensy bit...

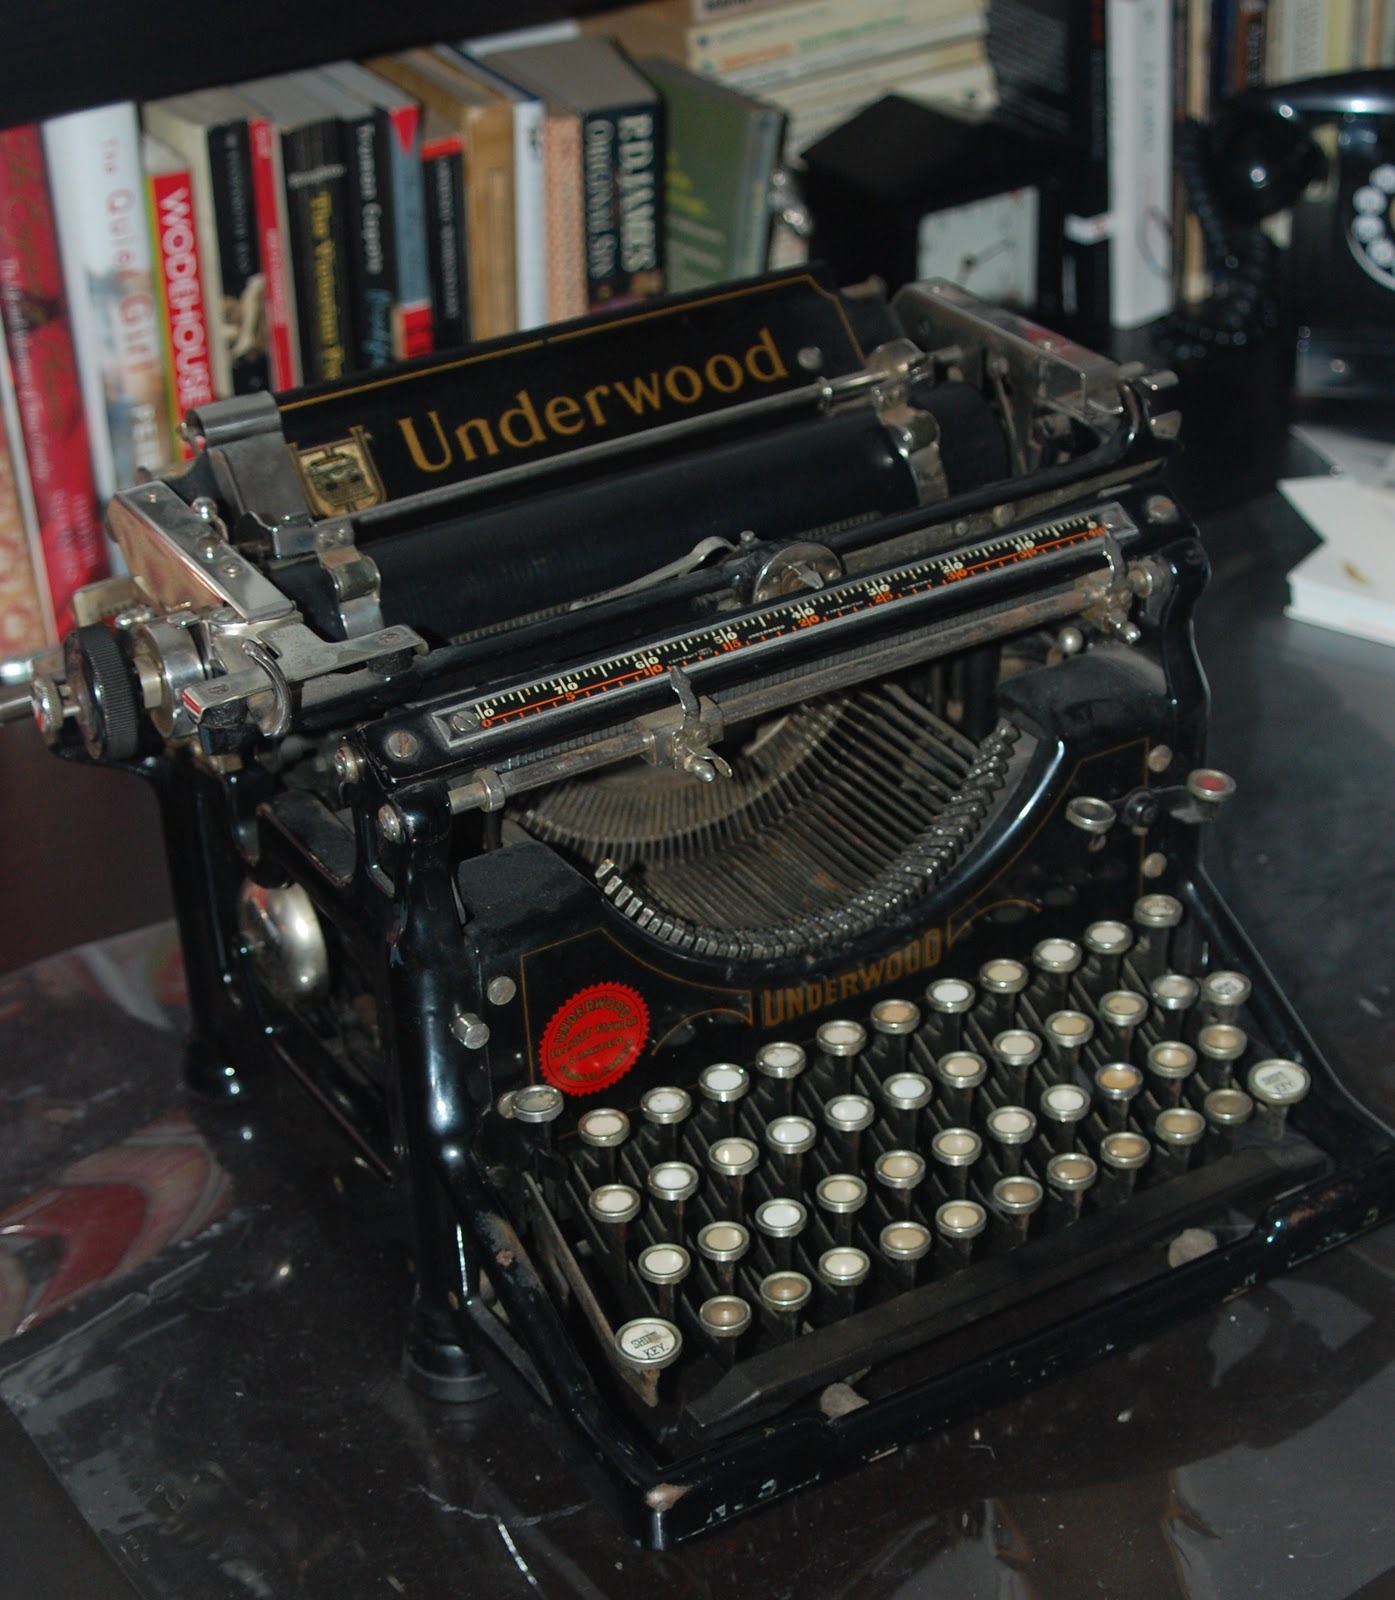
After work one day I stopped in at one of the little antique stores in town. They normally don't have anything of interest but that day a beautiful typewriter caught my eye. After much deliberation I went back about a week later and bought it! I've named her Miss Lemon which I think is an excellent name for a typewriter.


She is a 1923 Underwood #5. The interesting thing is that she is actually a teaching typewriter. This means none of the keys are labeled. I will have to brush up a bit on my typing skills before I can use her but it will be so worth it!


Some people have a bucket list. I have a "5 things to buy before I die" list. An old typewriter was #5 on the list. One down, four more to go! If anyone is curious the rest of the list consists of: an old farm complete with a brick Victorian farm house, a single strand of real pearls, an oil or acrylic portrait of myself (ok yes, a little bit narcissistic but I have always wanted my portrait painted!), and a car from before 1950.

That's All.